Container & layouts
The most basic way to present the user interface in an application is to break it up into nested containers with different layouts, inside which widgets are located for interaction.
The library provides a rendering manager in
which you will place your entire UI. The manager is located in ebitenui package.
1import "github.com/ebitenui/ebitenui"Manager needs to get constantly updated and drawed.
 1type Game struct {
 2	ui *ebitenui.UI
 3}
 4
 5 func NewGame() *Game {
 6    return &Game{
 7		ui: &ebitenui.UI{},
 8	}
 9}
10
11func (g *Game) Update() error {
12	g.ui.Update()
13	return nil
14}
15
16func (g *Game) Draw(screen *ebiten.Image) {
17	g.ui.Draw(screen)
18}
Any UI in this library consists of containers that are nested in each other. Container is located in widget package.
1import "github.com/ebitenui/ebitenui/widget"The manager is contains a reference to the root container and responsible for delivering events throughout the user interface.
Let’s pass our container there so we can interact with it. There is only one container type which can be created like this.
1func NewGame() *Game {
2    root := widget.NewContainer()
3    return &Game{
4        ui: &ebitenui.UI{Container: root},
5    }
6}
The standard library has a package with default colors that will be useful to us, like:
Indianred
,
Goldenrod
,
Steelblue
,
Mediumseagreen
,
Darkslategray
,
Gainsboro
.
1import "golang.org/x/image/colornames"The library draws all interface elements using multiple image tiles also known as nine-slice to prevent image scaling distortion. That package will help us to work with images.
1import "github.com/ebitenui/ebitenui/image"We have everything to get the first result. The container have several options to setup, like background color.
1root := widget.NewContainer(
2 widget.ContainerOpts.BackgroundImage(
3 image.NewNineSliceColor(colornames.Gainsboro),
4 ),
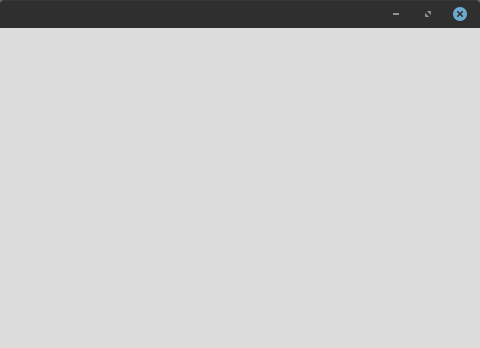
5)Lets run the app. We will see a single container that will take up all the free space.
Containers can be composed into each other. The order adding child containers does not matter.
 1left := widget.NewContainer(
 2	widget.ContainerOpts.BackgroundImage(
 3		image.NewNineSliceColor(colornames.Indianred),
 4	),
 5)
 6right := widget.NewContainer(
 7	widget.ContainerOpts.BackgroundImage(
 8		image.NewNineSliceColor(colornames.Steelblue),
 9	),
10)
11root := widget.NewContainer(
12	widget.ContainerOpts.BackgroundImage(
13		image.NewNineSliceColor(colornames.Gainsboro),
14	),
15)
16root.AddChild(left)
17root.AddChild(right)
To prevent child containers from overlapping each other, we can specify how they are positioned within the parent container using other container properties, such as layout.
1root := widget.NewContainer(
2    widget.ContainerOpts.Layout(widget.NewAnchorLayout()),
3)
Positioning within the layout is specified by the LayoutData structure inside each container. In addition, at least, each container must have a minimum size.
1left := widget.NewContainer(
2    widget.ContainerOpts.WidgetOpts(
3        widget.WidgetOpts.LayoutData(widget.AnchorLayoutData{
4            HorizontalPosition: widget.AnchorLayoutPositionStart,
5            StretchVertical:    true,
6        }),
7        widget.WidgetOpts.MinSize(50, 50),
8    ),
9)
Let’s set similar options for other containers.
1left := widget.NewContainer(
2 widget.ContainerOpts.BackgroundImage(
3 image.NewNineSliceColor(colornames.Indianred),
4 ),
5 widget.ContainerOpts.WidgetOpts(
6 widget.WidgetOpts.LayoutData(widget.AnchorLayoutData{
7 HorizontalPosition: widget.AnchorLayoutPositionStart,
8 StretchVertical: true,
9 }),
10 widget.WidgetOpts.MinSize(50, 50),
11 ),
12)
13right := widget.NewContainer(
14 widget.ContainerOpts.BackgroundImage(
15 image.NewNineSliceColor(colornames.Mediumseagreen),
16 ),
17 widget.ContainerOpts.WidgetOpts(
18 widget.WidgetOpts.LayoutData(widget.AnchorLayoutData{
19 HorizontalPosition: widget.AnchorLayoutPositionEnd,
20 StretchVertical: true,
21 }),
22 widget.WidgetOpts.MinSize(50, 50),
23 ),
24)
25root := widget.NewContainer(
26 widget.ContainerOpts.BackgroundImage(
27 image.NewNineSliceColor(colornames.Gainsboro),
28 ),
29 widget.ContainerOpts.Layout(widget.NewAnchorLayout()),
30)
31root.AddChild(left)
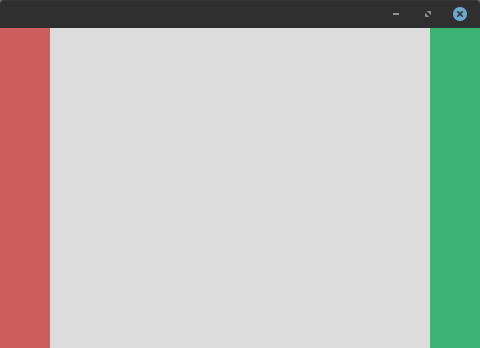
32root.AddChild(right)Let’s launch the application. We will see one root container in background and two child containers inside at different position that will stretch vertically.
The library has several different layouts for different situations, you can study each of them in detail on the next pages.